My rainbowfish metropolis is an ongoing work in progress. It's a low tech planted tank that gives my fish of choice plenty of scope to stretch their fins.
Permission for Project Initiation
The story began of course with the planning permission - not from the government, but from my wife. I had initilly got approval for a 7 x 2 x 2 but during further negotiations, my wife suggested an 8 x 2 x 2. I make it sound like it was a difficult process - it wasn't. My wife is thankfully very supportive of my hobby, the only condition being that it had to be done 'right' but at the same time, not too expensive. We didn't set any particular budget, but I had a fair idea in my head what the cost needed to be. I had to do quite a bit of work to keep them low.
Tank Stand
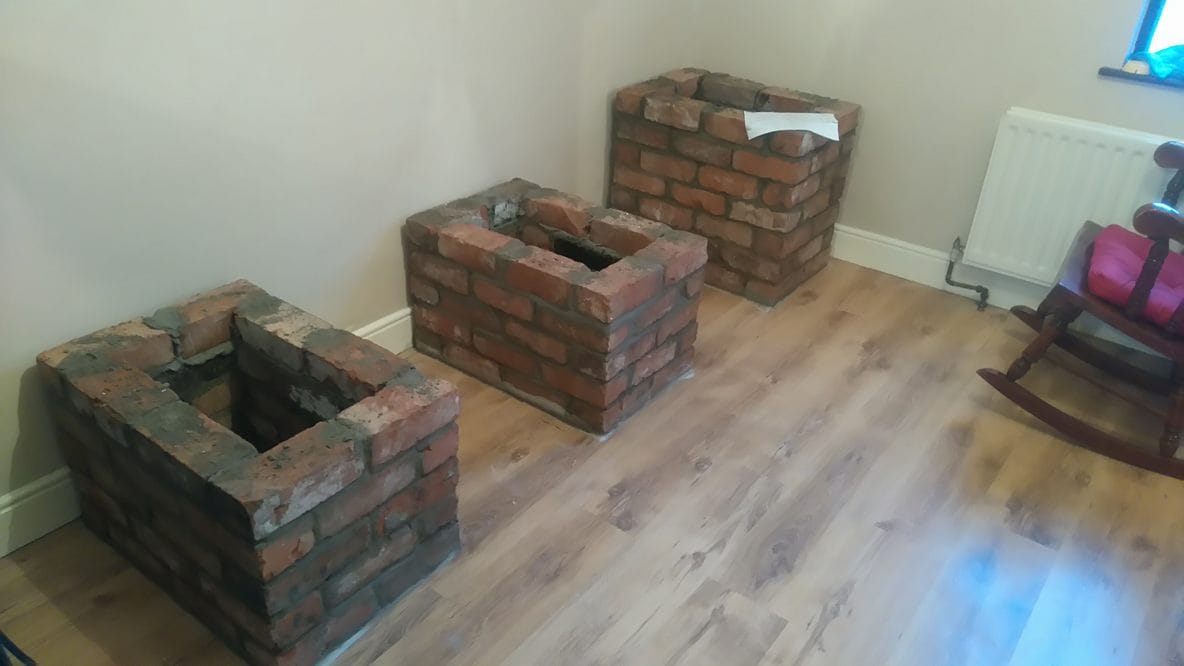
I had priced my tank with a local fish shop and was happy to place an order. It saved me the hassle of dealing with the manufacturer should anything have went wrong and it also meant I would have some help lifting the big tank into place. I went for an 8 x 2 x 2 with optwhite front pane for clearer viewing and top glass. I opted not to purchase a cabinet or lid, instead opting to go for my own design. The problem was that 1) I wasnt prepared to pay the price asked for a lid / pelmet - I thought it was too expensive and that I could do a good job of that myself. Secondly 2) I wasn't that fussed on most of the cabinets available. I had priced around and wood cabinets were in the region of £500, whilst unrapped metal stands were in the region of £900 - crazy. Instead I went for reclaimed brick pillars. Really strong, look great, and cheaper than a wooden cabinet. I'm not a brick layer so I did have to pay for someone else to do it - the cost was around £300. Yes, i'm going to have difficulty selling it or bringing the stand with me if I move house (I joke), but i'm not planning on doing that for the next decade anyway. I look at this as a great saving. Here's a few pictures of the build process below.
Below - Note - the pillars are built on top of the floor. Underneath is solid concrete.
Permission for Project Initiation
The story began of course with the planning permission - not from the government, but from my wife. I had initilly got approval for a 7 x 2 x 2 but during further negotiations, my wife suggested an 8 x 2 x 2. I make it sound like it was a difficult process - it wasn't. My wife is thankfully very supportive of my hobby, the only condition being that it had to be done 'right' but at the same time, not too expensive. We didn't set any particular budget, but I had a fair idea in my head what the cost needed to be. I had to do quite a bit of work to keep them low.
Tank Stand
I had priced my tank with a local fish shop and was happy to place an order. It saved me the hassle of dealing with the manufacturer should anything have went wrong and it also meant I would have some help lifting the big tank into place. I went for an 8 x 2 x 2 with optwhite front pane for clearer viewing and top glass. I opted not to purchase a cabinet or lid, instead opting to go for my own design. The problem was that 1) I wasnt prepared to pay the price asked for a lid / pelmet - I thought it was too expensive and that I could do a good job of that myself. Secondly 2) I wasn't that fussed on most of the cabinets available. I had priced around and wood cabinets were in the region of £500, whilst unrapped metal stands were in the region of £900 - crazy. Instead I went for reclaimed brick pillars. Really strong, look great, and cheaper than a wooden cabinet. I'm not a brick layer so I did have to pay for someone else to do it - the cost was around £300. Yes, i'm going to have difficulty selling it or bringing the stand with me if I move house (I joke), but i'm not planning on doing that for the next decade anyway. I look at this as a great saving. Here's a few pictures of the build process below.
Below - Note - the pillars are built on top of the floor. Underneath is solid concrete.
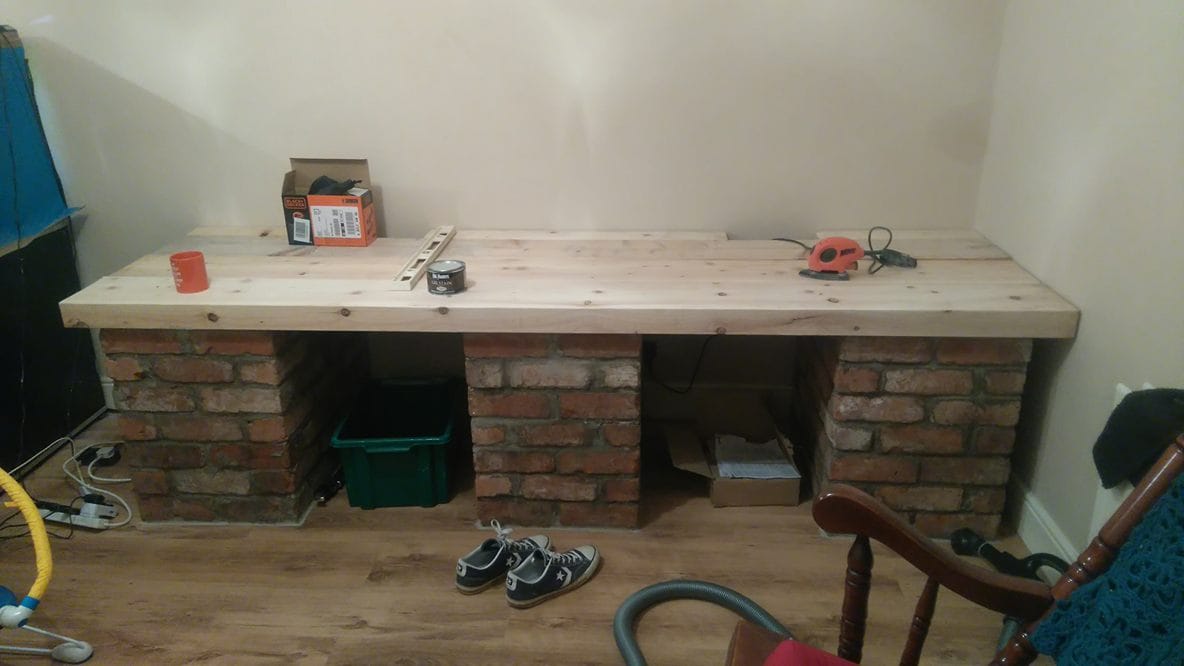
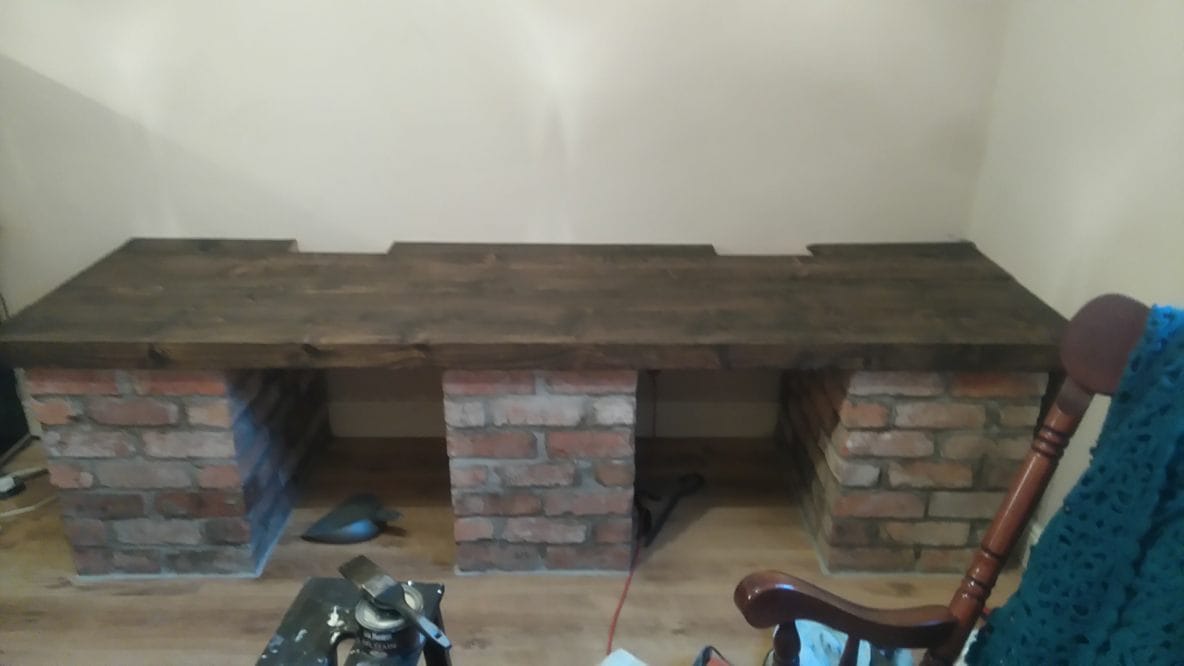
I then picked up some planks and had them cut to size at my local builders yard. They cost about £40 in total. I just had to level them, plane them, sand them and of course stain and varnish them - I like walnut. That's a rock solid stand sorted for £320. Im pretty happy with that.
Above - Some space left at the back so that I could feed pipes and cables for electic and filters etc.
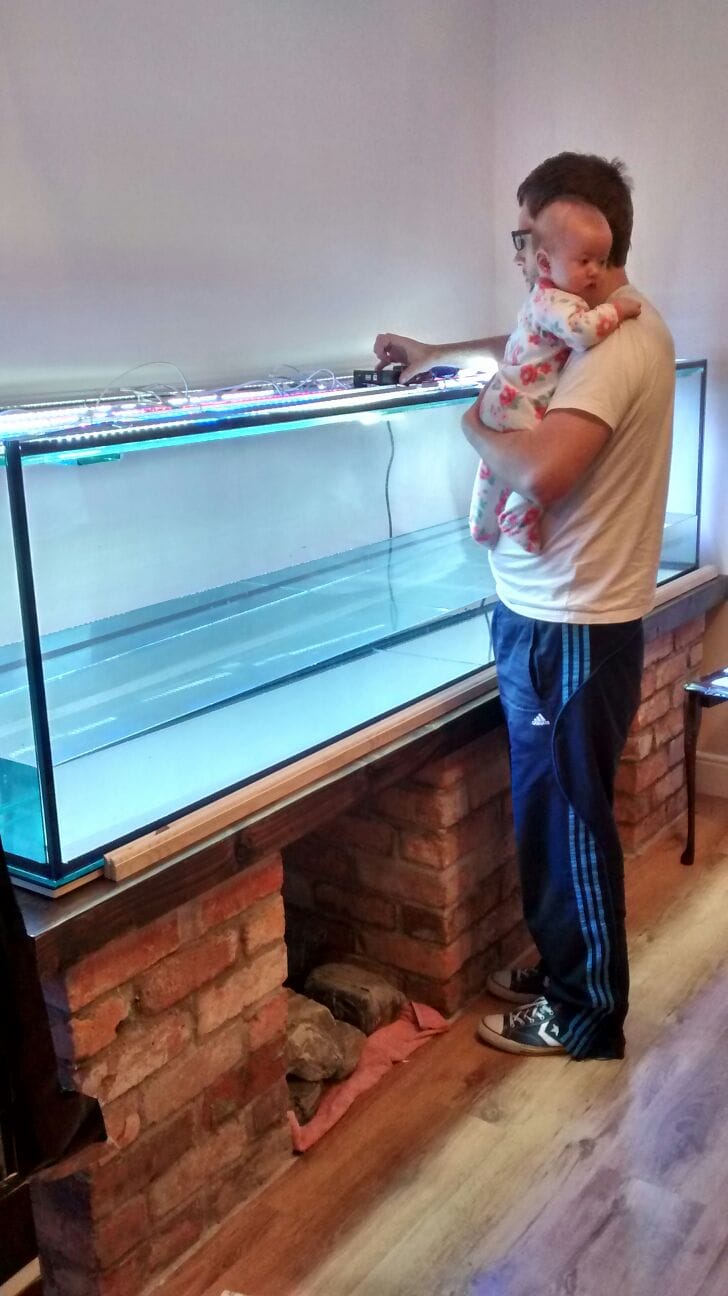
With the stand ready, I just had to wait for the tank. Before it came I purchased an 8 x 2 x 2 piece of plywood, the exact measurement as the base of the tank. This would make sure the tank was put down on a perfectly flat surface. I screwed it in to place and made sure the screws were countersunk.
Confidence Test
When the tank arrived, to say I was excited was an understatement. But when the tank was set in place I confess to feeling very, very nervious. I had the worst visions fo the tank bursting and flooding my livingroom / the whole downstairs. This beast would hold around 900 litres. The last thing I wanted was a burst tank. And so, more for me than for any other reason I filled the tank slowly over the next few days. A third of the way each time.
Lighting
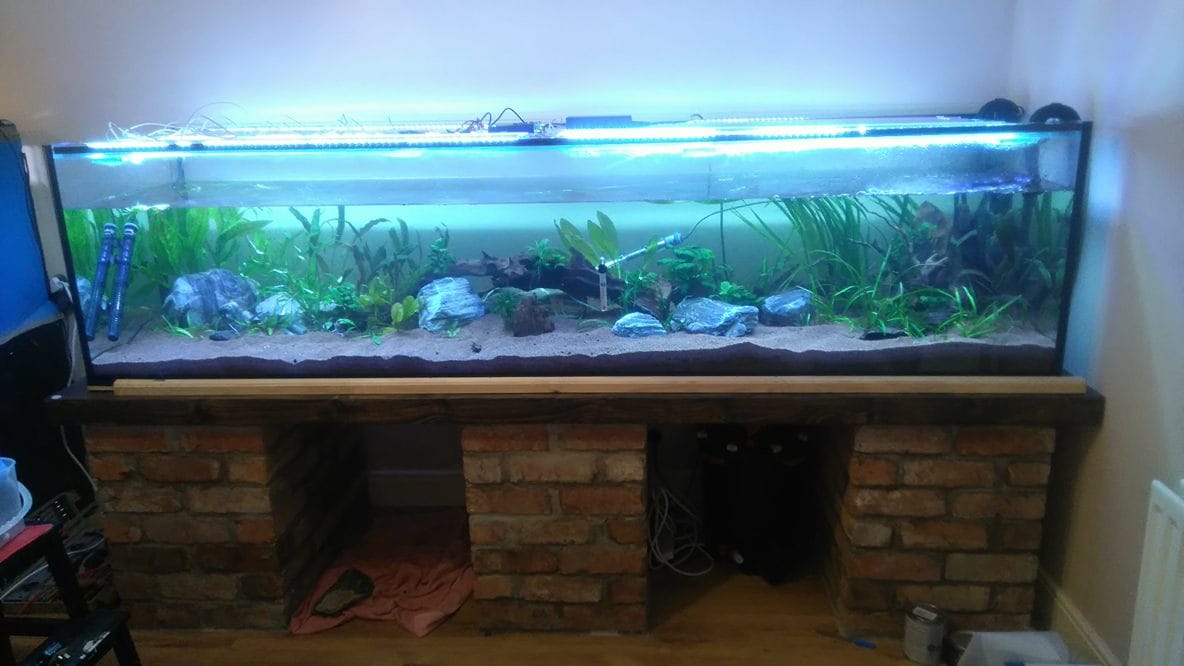
In the meantime, my lighting had arrived and I set that up too. Having scoured the market to see what was available, I finally settled on the Lunar LED 7 ft plant package. This cost £284 for 2 white, 1 red and 1 blue 7ft LEDs. Very good value for money and they are fully programmable, gradually brightening up and gradually powering down. I'm no guru when it comes to lighting, but i'll certinaly say these are more than ample for the low tech plants i'm growing. What's more if that they are set to come on to a maximum of 80% of what they are capable of, so if required, you can program them to get brighter. i did go for the 10,000K white lights though and this was an oversight. The colour temperature was wrong and many of the 'blue based' rainbowfish looked faded. I purchased 2 further white lights (6500K) and replaced the 10,000K white lights and these work much much better. After trialling them for a while I got rid of the blue lights and put in an additional white. I think the balance is much more to my taste. The lights are a great product, and the customer service offered by Lunar is second to none.
In the meantime, my lighting had arrived and I set that up too. Having scoured the market to see what was available, I finally settled on the Lunar LED 7 ft plant package. This cost £284 for 2 white, 1 red and 1 blue 7ft LEDs. Very good value for money and they are fully programmable, gradually brightening up and gradually powering down. I'm no guru when it comes to lighting, but i'll certinaly say these are more than ample for the low tech plants i'm growing. What's more if that they are set to come on to a maximum of 80% of what they are capable of, so if required, you can program them to get brighter. i did go for the 10,000K white lights though and this was an oversight. The colour temperature was wrong and many of the 'blue based' rainbowfish looked faded. I purchased 2 further white lights (6500K) and replaced the 10,000K white lights and these work much much better. After trialling them for a while I got rid of the blue lights and put in an additional white. I think the balance is much more to my taste. The lights are a great product, and the customer service offered by Lunar is second to none.
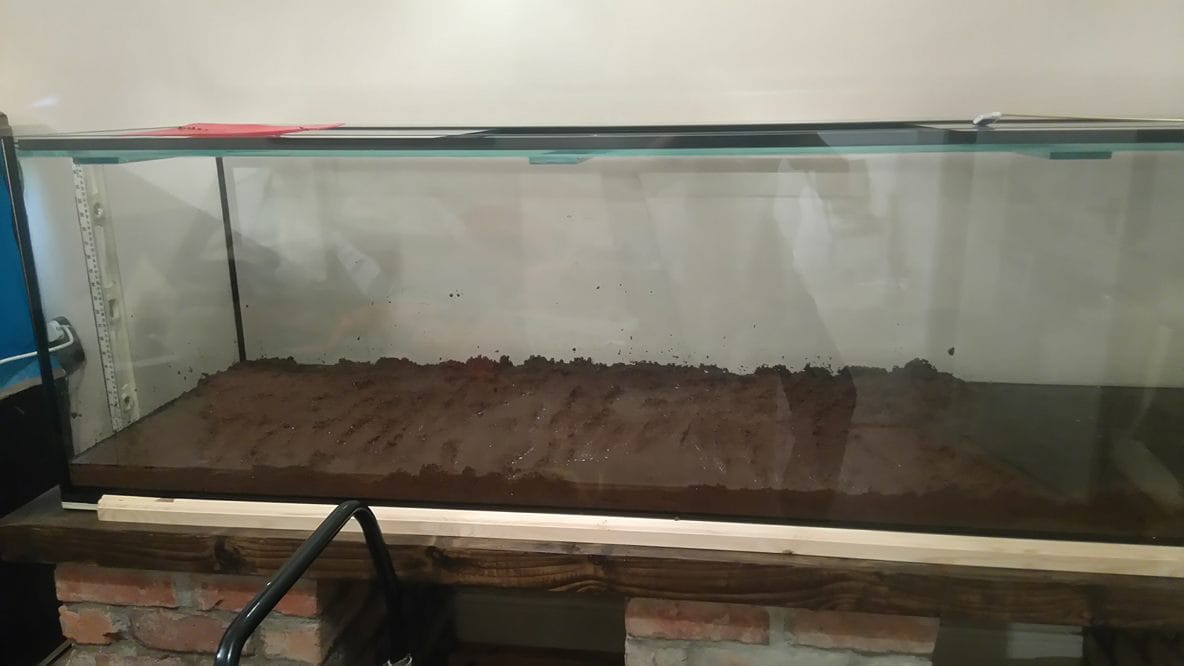
Above - Once I drained the tank following the confidence test, I added Tetra Complete Substrate covered with JBL Manado.
Hardscape
I played around with the hardscape a little - both stones and bogwood until I found something I was happy with. The bogwood I took from other tanks I had in the house and the stones I picked up. Really nice stones with nice strata - exactly what I wanted. Unfortunately I don't have any pictures with just 'hardscape' but there's not too many plants in here at the minute.
Under the tank to the right, you see my filtration - a FX6. This is my only filter at the minute, in time I will have something on the other side as well. The FX6 was then fully covered over with a fully removable shelf which will stop my little one getting near the filter or the electrics when she's older - as you can see from the picture below. It also helps dampen any filter noise.
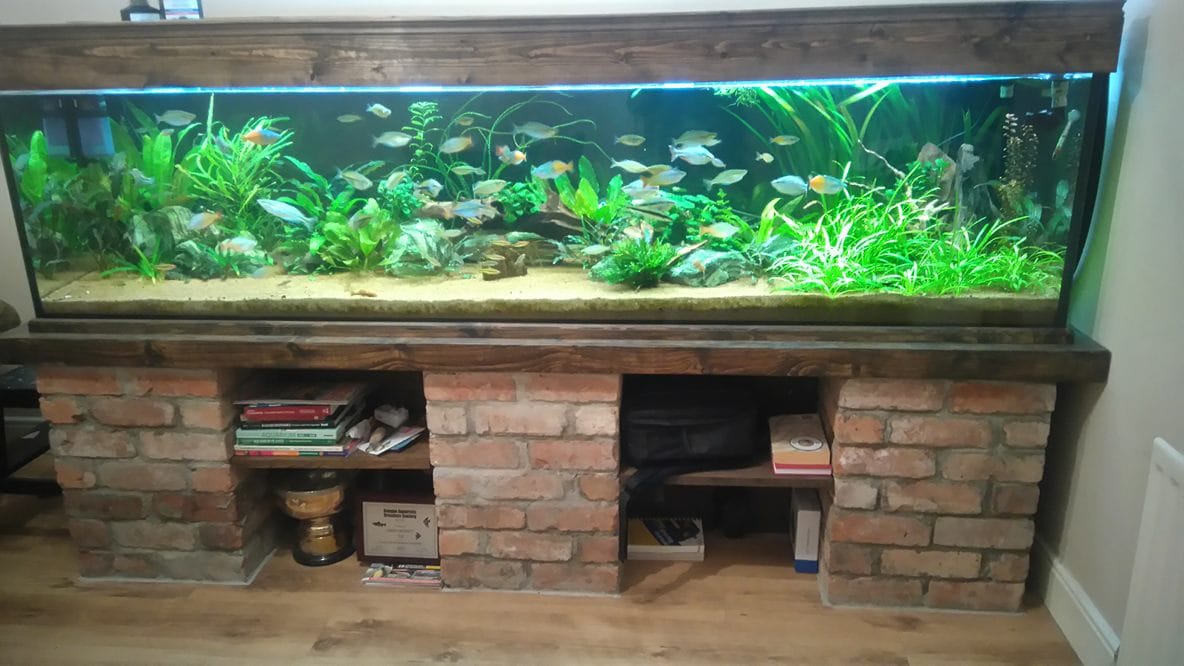
I've added a black background and I've finished the tank with some cheap trim around the edges (only a few pounds) to hide the plywood that the tank sits on. It looks really well. I've also had my first go at making the hood. It requires a little adjustment so that it comes further down the glass but that is easy to do. As you can see - low tech as it is, the plants are doing really well - and I also have a fantastic looking Crinum Calimistratum in the back centre - my favourate plant. Lots of gaps in the back - I will fill these up in time and as you can see, there's plenty of room for more rainbows!
Anyway - thats my progress for now - i'll add to this blog as and when...
Thanks for reading...
Anyway - thats my progress for now - i'll add to this blog as and when...
Thanks for reading...
 RSS Feed
